Support System Guide
Introduction
This document is provided to familiarize Partner’s technical team with Simplanova Support system. Simplanova provides support to all Microsoft Dynamics NAV Development services provided by company. Length of support period depends on the agreement signed between Partner and Simplanova companies.
Access
Simplanova Support System can be accessed using the following link: https://support.simplanova.com/

Each Partner will have an account or multiple accounts created with access to Simplanova’s Support System. If Simplanova has provided Microsoft Dynamics NAV Development services for multiple projects, then the same support user accounts will be in use for all support cases.
User account
Simplanova Development Team will create user accounts for Partner’s team at the time when support period will begin. When new account will be created, user will receive an Account Registration email from Simplanova’s Support system to Partner’s provided email:
The user Administrator has created an account for you with username
"UserAccount". In order to complete your registration, visit the following URL
(make sure it is entered as the single line) and set your own access password:

Link_to_access_profile

If you did not request any registration, ignore this message and nothing will
happen.

Do not reply to this message
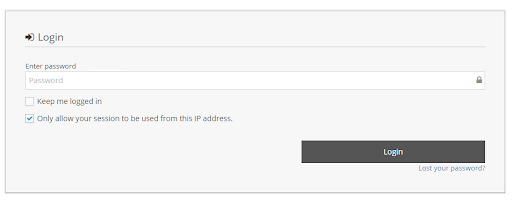
Setting Password on First Log-in
For the first log-in user has to follow the link provided in Email (1.1 User Account). By clicking on the link user will be redirected to Profile Page in Simplanova’s Support System:
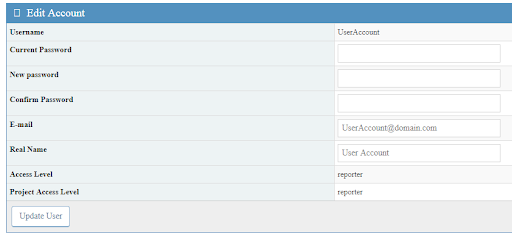
User has to fill in at least Password and Confirm Password fields and then click Update User Button to be able to login to the support system later.
Forgot Password
In case of forgotten password, user will have to click on the link “Lost Your Password?” in the home page of Simplanova Support System.

User will have to fill in his user name and email which was provided in Simplanova’s System Profile page.

System will send the user an email with a link to reset password page.
Issues
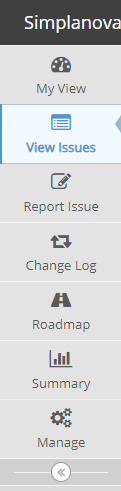
All reported issues will be split into groups by statuses and displayed in My View page. Also there is possibility to view and filter issues in View Issues Page.
Issue Status
Each reported issue in Simplanova’s Support System will have one of following statuses:
- New – Initial status, all newly created issues will hold this status. It will remain until Simplanova will acknowledge the issue.
- Feedback – this status will show that Partner which reported the issue should take an action. It means that Simplanova is awaiting reply from Partner to the last email or note added.
- Acknowledged – status which will be in use when Simplanova will confirm that issue has been received, but no resources have been assigned.
- Confirmed – status will be in use if Simplanova has been able to reproduce the issue but still no resources for fixing have been allocated.
- Assigned – status shows that issue solving is in progress and one of Simplanova’s team members has been assigned.
- Resolved – covers part of support process when Simplanova delivers the fix / solution and Partner’s confirmation is required to close the issue
- Closed – Issue will be closed when partner will confirm that issue has been resolved. Also all issues will be closed on support period end date and no matter which status they were before that moment.
Register New Issue
To register a new issue, user has to navigate to “Report Issue” page, to which link can be found in the top menu.
If user is responsible for multiple projects, then project has to be switched (top right corner) before navigating to “Report Issue” page:

Simplanova would like to ask Partners to provide as many details related to the issue as possible.
Relationships
Some issues may be related to one another, or may be a duplicate. Therefore, it’s best to use the “Relationships” tab and assign the issue to another one by inserting the ID of an issue.
